|
Tires & Wheels/Two-Piece Runflats for One-Piece Wheels:
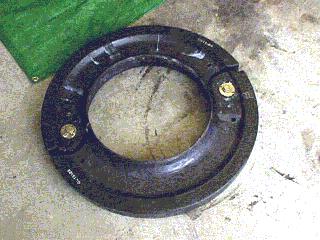
The two-piece run-flat can be removed with simple tools. Special tools are required for re-installation, however.
Removal procedure:
Break bead of tire loose from wheel (inside and outside - remember, this runflat provides no beadlock of any kind).
Remove the outside tire bead from the wheel. We used several (large) pry-bars to get the tire bead over the wheel.
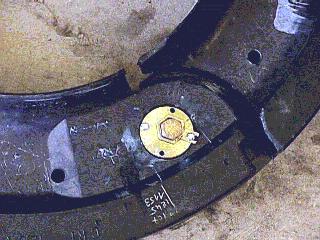
Pry the tire aside where the runflat fasterer is located. (There are two. Do them one-at-a-time.) Place a screw driver into the two holes in the runflat located near the fastener. This will help hold the tire away and allow easier access to the fastener.
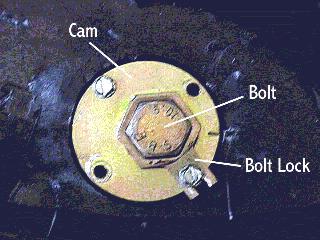
Remove the two (or three) small screws. Remove the bolt, and the cam.
Repeat procedure on other fastener.
Push the runflat pieces to one side, and use pry-bars to move the inside bead of the tire off over the outside of the wheel. The runflat pieces can then be removed from the tire.
Installation procedure:
The basic procedure outlined above is used in reverse. The only difference is the use of the cam to tighten the runflat onto the wheel. With the cams and bolts installed, the cam is turned (using a special tool, or the improv method of your choice) to tighten the runflat. Turning the cams causes the two runflat halves to fit more tightly against the wheel. When the cams are in position, one of the screws is inserted to keep the cam from rotating. The bolts are then tightened, and the bolt lock is installed with the other screw to prevent the bolt from coming loose inside the tire.
Removal is much easier, and since we were changing wheels, we did not have to perform this operation.
Dave Breggin
'95 Diesel Wagon

Two-piece runflat for one-piece wheels

Closeup of runflat adjustment - Observe: No beadlock

Closeup of runflat adjustment cam
|