|
Heater Core Removal and Replacement:
by Scott Freeman, 1995 Hummer Wagon
When my Hummer began to leak coolant from the overflow drain, I tried to fix it by adding stop leak. This worked for about 2 years. Finally the leak got so big that I had to bite the bullet and fix the problem the right way. After numerous phone calls, e-mails and conversations, it seemed apparent that I should purchase the AMG factory replacement kit. At the time of my research, there were 2 options: get a replacement core for approximately $1400.00 or upgrade to the "new and improved" system complete with core, fan, wiring, controller, etc. for approximately $2700.00. Most people agreed that it was impossible to "fix" the existing unit, as it could not be re-assembled properly. Also, many dealers said that trying to do the work myself was asking for problems and that it was an 8-9 hour job. At $70.00 per hour, this was going to be expensive.
I decided to take a chance. A fellow HML member had posted that Lefty's Automotive, Inc. in Chicago was selling refurbished units. I called and ordered one ((773)763-4000). It arrived as advertised ($400.00 + shipping). He cuts apart units, fixes the heater core, and re-welds them back together. So far the unit is working fine and I am sending my old one back to him as a "core".
The following is how I removed the unit and a couple of tips on making the job easier:
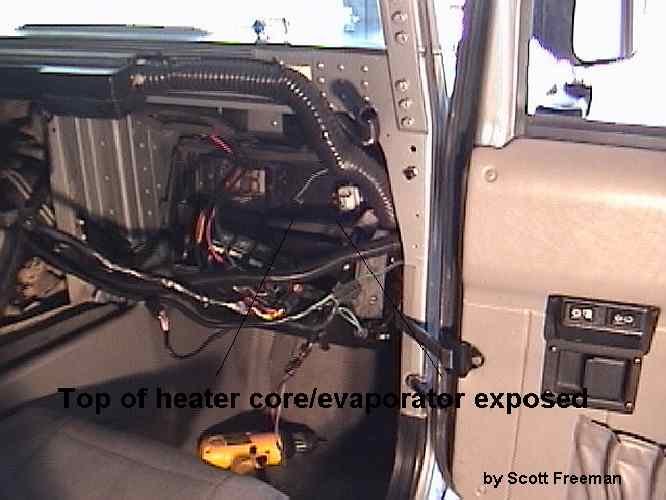
Interior prep work:
- I began by removing the doghouse and dash trim piece. Removing the doghouse gives you more flexibility in moving wire looms and allows more light into your workspace.
- Next, I would recommend removing the passenger front seat via the 4 bolts above the slide mechanism. (This step is not necessary, but it allows you a lot more room to work and only takes a few minutes)
- The two trim panels in the kick area of the foot well needs to be removed next.
Engine compartment/Air intake:
- Drain coolant from your radiator, have A/C system evacuated.
- Remove the coolant overflow container
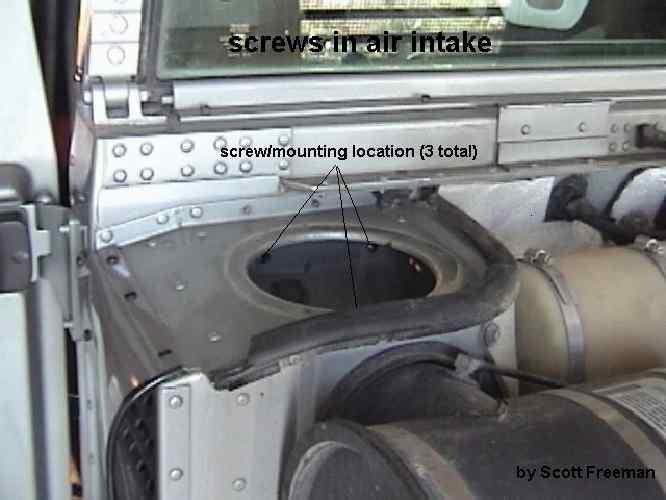
- Remove Air intake
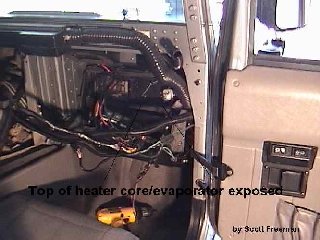
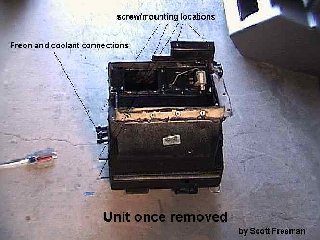
- Inside the Air intake, you will find 3 bolts (see picture). All three must be removed. These were metric on my truck and required deep-dish sockets. The bottom one supports the bulk of the unit. I would advise just loosening it until ready for final removal.
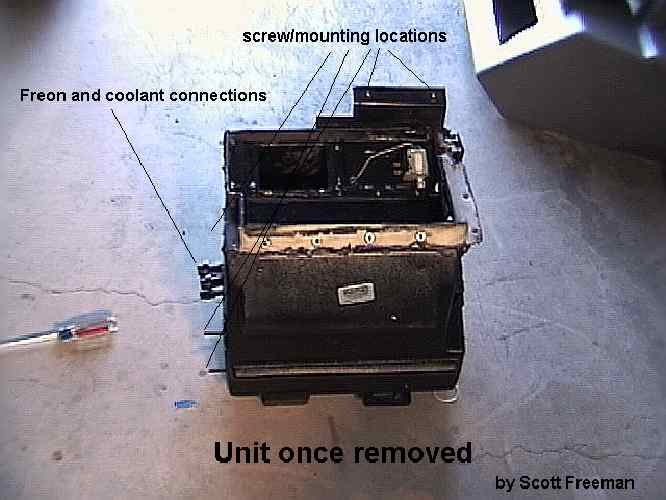
- Below the coolant overflow tank are the main connections for the coolant and Freon. These need to be disconnected (keep in mind the freon lines need to be kept free of dirt, etc.)
- Around the connections there are 3 nuts that hold the unit in. Mine were metric. All three need to be removed completely.
Removal of the unit:
- To ease removal, I began by removing the relays on the blower unit. Then, in no particular order, I removed the blower unit and the defrost diverter. I was careful to note which screws went where, as some are different sizes. The wiring is easy and straightforward.
- Next I removed the drain line and the vent line at the floor.
- Now you can remove the last screw in the Air intake.
- With some creative movement, the unit will come out. Now was when I wished I had taken the seat and interior trim off first! Remember that the unit has foam insulation and lots of RTV on the engine side, so some force is necessary.
- My replacement unit was missing some temperature sensors and motors. I compared the two side-by-side and transferred what was missing.
Putting it all back together:
- I simply reversed the process.
- I did make a few improvements:
- adjusted the platen to allow more A/C and less heat.
- added and replaced lots of foam insulation at air connections.
- put in a coolant/heat by-pass for summer operation.
- put ˝ inch aluminum plate on both sides of the plastic connection between the blower motor and the replacement core (I broke 2 screw holes during removal and found one that had been broken previously)
- I had previously installed Flow-thru ventilation (it really does work)
- Just a reminder: while you have all this apart, now is a great time to open up the back engine cover and fix all those annoying things like: transmission fill tubes, check glow plugs, tighten valve covers, run new accessory lines and generally clean up the amazing amount of garbage you will find.
The entire process, including modifications, took me about 10-11 hours. The core part alone took about 7-8 hours. With some experience, it could probably be cut to 6-7 hours.
|